Taking professional quality pics is every moms dream. You want to capture every moment like a paparazzi, but taking the time to snap, edit and share takes more work than you know, but with a good camera and quick tips - your life in pictures will change. Since I'm not qualified to share photog tips, I asked my wonderfully talented friend Kristin who owns her own photography business, Kristin Mann Photography, to share her tips so that you can start shooting pics like a pro. Here's what she had to say...
(Photo credit: Kristin Mann Photography)
I love sharing tips on taking photos – especially with Moms – because time moves so quickly when they are little ones that you never want to miss a moment. And the beauty of photography nowadays, is it really only takes a few key pieces of equipment and simple tips to really capture something beautifully.
THE BASICS: WHAT YOU NEED
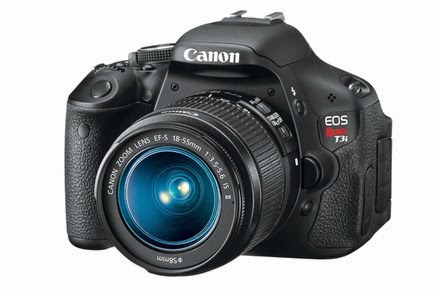
 1. Base Digital SLR Camera. Investing in a solid base digital SLR camera is the first step in allowing you the flexibility and control necessary to get the shots you want. And now that they’ve become more mainstream, they have become quite reasonable. I am a Canon fan and love their Rebel series. Amazon, Costco, and even Groupon sometimes have deals on basic DSL camera bodies or starter kits.
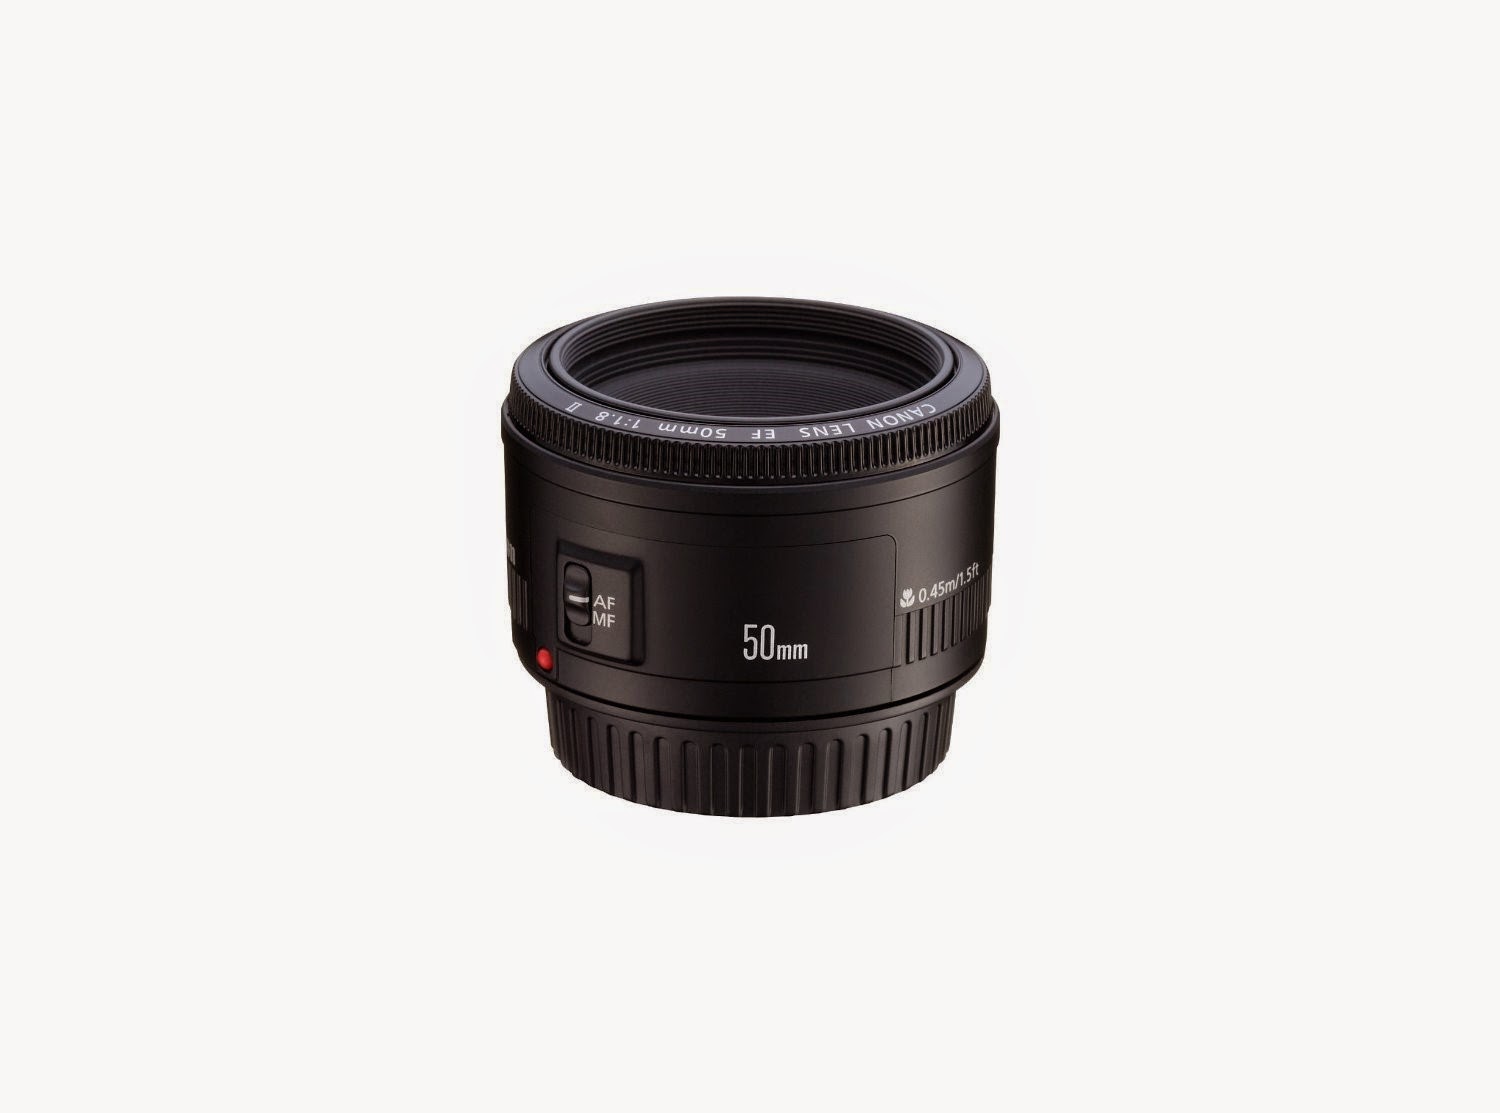
 2. A .50MM lens with f/1.8 maximum aperture. This is my secret weapon. I know the second acronyms get thrown around, photography sounds intimidating but you don’t even need to fully get into the nitty gritty of why this lens is so wonderful – just trust me, if you just buy one and use it you’ll thank me.
 This lens offers you a really great quality of depth of field helping to achieve the look of a crisp subject against a more blurred background. It’s fantastic for portrait shots and making those angelic features on little ones stand out. As another plus, it allows in more light to your lens, which will allow for you to take more natural photos before the flash goes off (see #3). (Bonus: You can find a good quality .50MM at only around $100.)
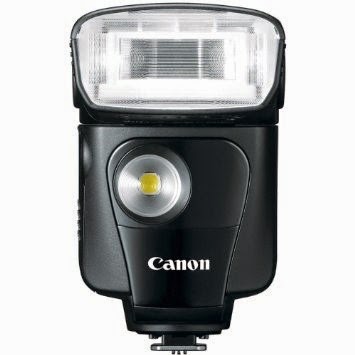
 3. An external flash. Lighting is one of the trickiest things about photography – even for professional photographers. It is a constant dance to find balanced, even light that allows the camera to focus on subjects evenly and naturally.
 The key to flattering and eye-popping photos is the most even and largest light source. The problem with the regular flashes on cameras is that they only shoot one way – toward your subject in a relatively small flash size. This can cause harsh shadow lines, odd reflections, and all around washed out or unnatural look. The beauty of an external flash is that: A) Its larger so it already allows for a less focused light source and B) It gives you the flexibility to guide where the light goes – you can buy a cheap plastic piece to bounce your flash and if you tilt it towards a ceiling or wall, you’ll get a beautiful reflected flash vs. a harsh direct one.
4. Good Travel Case or Systems: As Moms we already have to carry so much with us wherever we go – in fact, this is my number one deterrent from being camera-ready when I ultimately should be. What helps is coming up with a system that works for you – if you can even just carve out space in diaper bag for your camera and get some individual covers for lenses, you’d be surprised how much easier it is to throw it along for the day.
TIPS:
1. Get to Know Your Camera: Really get to know your camera and don’t be afraid to rely on the automatic settings for it – they are there, so use them! Not everyone has the time to figure out all the ins and outs. I suggest Portrait settings for any up close photos where you want to capture the gorgeous details of your little one while they are more still – Sport is a great option for when they are on the move. There are so many videos on YouTube now – definitely check out the one specific to your camera to learn more about how to really get the most out of it.
2. Location, Location, Location: There really is nothing like Chicago in the spring through fall – you can get a gorgeous backdrop of the skyline at the Lincoln Park Zoo bridge or be blanketed in the beautiful autumn hues in the fall. Be sure to take advantage of the opportunity to use these while you can!
If you don’t happen to be on the lakefront or have the most ideal picturesque background you may be surprised what you’ll find as an interesting background if you perhaps just frame the photo a bit tighter. An interesting brick wall or some old brownstone steps can actually provide a stunning location for photos. Remember to always keep your eye open!
Unfortunately for Chicagoans, there are also an additional four months (or in the case of last year – what felt like seven months!) you are up against winter. Snowy backdrops can actually make for some of the most gorgeous shots but if it’s just too cold be sure to try and find a location inside with a neutral background and plenty of natural lighting.
(Photo credit: Kristin Mann Photography)
3. Frame it up: You only have a few seconds to decide exactly how to frame up a shot (especially with the case of a moving toddler target) so it’s important to really get it right. Framing a shot is something that I’ve noticed tends to be more of an innate skill but that’s not to say it’s something that can’t be improved.
Be mindful of photos that really catch your eye – you’ll start to notice that it may actually be the way that the photos was framed that really makes it standout. Sometimes centering a subject to the left or right vs. straight center can add interest to a shot and provide some spotlight on a beautiful background. The way a photo is framed can sometimes allow the photo to tell a better story or even may just better balance it with the colors that are then captured. This is definitely a trial and error skill so just practice and be mindful of it and you’ll likely begin to notice a difference.
(Photo credit: Kristin Mann Photography)
4. Time of Day: You may have heard photographers refer to the “Golden Hour” during the day – this refers to the first and last hour of sunlight during the day and it can really be an ideal time to take photos. It’s a stunning time of day when the sun is casting a more gentle glow and you aren’t dealing with as much squinting so the result is more natural smiles and less fighting with shadow lines. That said, as most Moms know – our toddlers rule the world even more than mother nature – so I usually go off of their schedule. You can have perfect lighting but if you have a cranky toddler, you aren’t catching a cute photo. I usually aim for early morning photo shoots or post first nap for those that are down to two naps and usually have the best luck.
5. Posing: Ideal posing definitely depends on age and situation. For newborns, focusing on cozy locations and/or items of meaning is always a good choice. If you can get a baby happy (and sleepy) that’s best (I usually aim for post-feedings). A warm baby is also a happy baby so if you are taking newborn photos, you may want to crank up the thermostat. For older kids, the key is to make sure they feel comfortable and to take their lead – this means you’ll usually be moving non-stop as they do. If all else fails, tickling or having dad toss a little one in the air is always a full-proof way to get some sort of a laugh and genuine smile.
6. Shooting in the Raw: One of the best tips I’ve ever received was to make sure I’m always shooting in the Raw format (you can check online or on YouTube to be sure to adjust the settings to this on your specific camera). This allows you to take the largest file size you can take for a photo which means it allows you to capture the most data for an image. This is critical because when editing a photo, the more data you have available the more you are able to do with a photo. For example, if a photo is very dark and you are looking to brighten it – a photo taken in a smaller file size may become more grainy when enhanced while a raw file size will have more data to pull form and therefore provide a clearer photo.
7. Be Prepared: Moms are already good at this one. Just like I always make sure not to leave without my daughter’s water, plenty of snacks, and a change of clothes – if I have my camera on me, I make sure I always have extra batteries and memory cards. There’s nothing worse than actually remembering my camera, having the perfect moment ready for me and realizing I’m shooting with a full memory card. Always be prepared so you never miss a moment.
Happy shooting!!


No comments:
Post a Comment